Welcome

Welcome! I'm so glad that you've stopped by to visit. This blog started with Paper Crafts but since that road leads to so many others it has since become a place for all types of crafting adventures from card making to DIY home projects. Scroll down on the right to find posts by labels and dates or try my search bar to find your inspiration.

Happy Crafting!


Showing posts with label Party. Show all posts

Monday, June 18, 2012

Mother’s Day Brunch

Mother's Day Brunch
So you might be looking at this picture and thinking that I’m slightly behind the times seeing as how it was Father’s Day yesterday and Mother’s Day was about a month ago; or you might be thinking that I like to plan really far ahead!  Either way read on because, although this is what I did to celebrate Mother’s Day this year, my Ideas, Tutorials, and Recipes can be used for any party, and any time of the year. 

Amanda's Parties To Go
So I knew I wanted a theme that was really bright and happy.  Something a little bit modern and definitely fun.  Off to Pinterest I went in search of inspiration.  I came across the picture above.  It’s from Amanda's Parties To Go.  She has a great site and freebies to print.  Her freebies also inspired me to make my own from scratch.  I made them using Photoshop.   
Mother's Day Signs
I made these signs to stick in with my flowers in vases and to pin to crepe streamers which I tied around the chairs. 

Sign
Sign 2
Sign 3
I also made little circle tags to attach to my napkin rings and narrow tags to wrap around the stems of glasses.
Mother's Day Brunch Tags
NapkinNapkin Ring


I really like how my napkin rings turned out.  They were so very easy to do.  Here’s How I made them… (click 'read more' to keep reading)

Monday, May 21, 2012

A Birthday Party

Happy Birthday Banner
Ever since I was a little girl I dreamed of being a event planner.  I’ve always wanted to have big, glamorous dinner parties that would we be written about in flashy magazines.  Now that I’ve reached adult maturity (at least somewhat…), I realized that life’s dreams are not always attainable and that sometimes we need to scale them back a bit, but, our new dreams are still fabulous in their own way.  For example I’m not a ever-so-popular event planner but I am a crafter, blogger and learning DIY-er who still gets to share her creations with others.  And the big, glamorous dinner party turns into something I can make, even with a tiny budget, if I just use my creative skills and some imagination. 

Which is exactly what I did for my hubby’s party this year.  I used Photoshop, the dollar store and my own ideas to make his party this year.  Now would be when I show you my fabulous party with pictures that make you drool, except that being that I had some 25+ people over and I was trying to finish setting up before hubby came home (it was a surprise party) that I forgot to take pictures of everything finished…yes I did cry a little when I realized that…but I will share with you the photos I do have and some free printables at the end of this post…

I have a lack of tables in my home.  I would love to have a buffet table that I could set up and decorate but until that day comes I grab what ever little tables I can find and hide and decorate them.  For this party I covered that tables with a white with green polk-a-dot fabric that I had from my own baby shower from 3 years ago.

Tables
I cut the fabric up and gave it a swag which I held in place with pinned tissue paper flowers.  I made them like my Napkin Flowers which you can find here

Tissue FlowerTissue Flowers

Tissue Flower
I made a birthday subway art and put it into a $3.00 frame that I found at Wal-Mart and set it on the table with my bright green plates and cutlery.
Bday Subway Art
Cutlery Table


I wrapped my cutlery in a napkin and put the napkin in a napkin ring.  I made the napkin rings by wrapping paper towel holder cardboard tubes in white contact paper.  I then splotched them with green sparkly acrylic paint and glued on a tag that I made in Photoshop and finally added a little jeweled flower.

Happy Bday Napkin
Celebrate Napkin


 As some accents on the tables I had yellow flowers in stemless wine goblets, which also had a tissue paper flower attached to a toothpick all floating in green water.  For another accent I had little flowers inside a small glass jar.  It doesn't seem like much, but it added a bit of color and dimension to my tables.

FlowersGlass Jars w Flowers


One my juice table I had put my mini champagne glasses which had more little labels that I had made in Photoshop.  As you can tell I really like to use Photoshop!  I didn’t get a finished picture with my punch bowl and the glasses filled up but hopefully you can imagine what it looked like from this picture…

Drinks TableTags
A combination of the tags on the right were on the stems of the glasses on the left.  Sorry it’s so hard to see.


Above the juice table I had my Happy Birthday Banner which I had also done up in Photoshop.  I added a paper flower I made too.  It’s a 12”x12” sheet of cardstock cut into 1” wide strips with the ends folded into the center and pinned together with a brad.
Happy Bday BannerFlower
Punch Table
Above the other tables I had more decorations that I had made from cardstock.

Hanging Ornaments 1Hanging Ornaments 2

Hanging Ornaments 3

This was such a fun and easy party to create. It was a great basis for more parties. Check out my Facebook Page for some FREE Printables!  Look under my Exclusive Content tab!

Happy Partying!
signature4_thumbPost-Divider-100h5_thumb

Sunday, October 2, 2011

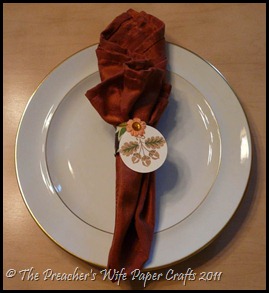
Autumn Napkin Rings

Picture12


It’s almost Thanksgiving here in Canada and, like I promised in my last post, I have some napkin rings to add some fall flair to your dinner table.  You can also see these napkin rings in a table setting at Leia's Culinary Treasures, my mothers fabulous blog.  While these particular ones are for autumn, you can vary this project for all sorts of occasions.  I hope you enjoy making these for your holiday feast.

Picture1
Picture2
Picture3
Picture4
Picture5
Picture6


Picture7(If you don’t know basic steps for embossing check out my post "Lampshade" to see the simple steps.)

Picture8
Picture9Picture10
             Picture11
These napkin rings are so easy to make.  I hope you try them out and some fun to your table.
Happy Scrapping!
 

Monday, September 19, 2011

Pumpkin Patch

Picture11
I hope you enjoy this little project of mine.  I must admit this wasn’t my idea.  A friend of mine made a version of this little creation and brought them to my house for Thanksgiving Dinner.  I thought they were so adorable that I just had to figure out how to make them.  Luckily I was successful and now I have my own Pumpkin Place Holders.   Good thing too because Thanksgiving in Canada is only a few weeks away.  In fact, my mother, over at Leia's Culinary Treasures, has posted wonderful advice and recipes for Thanksgiving.  She has so much to share that she has cleverly created an entire Hostess Survival Guide to help one get through the holiday.  You can even see my little name holders in action there, oh and there are some napkin rings there too, but that’s for my next post Winking smile.

Well lets get to it.  Pumpkin Rings Tutorial

Picture1
Picture2
Picture3
Picture4
Picture5
Picture6
Picture7
Picture8
Picture9
Picture10
So here is my little Pumpkin Patch. Aren’t they adorable?!  I do hope you enjoy making these for your fall get-together.
Happy Scrapping!