Welcome

Welcome! I'm so glad that you've stopped by to visit. This blog started with Paper Crafts but since that road leads to so many others it has since become a place for all types of crafting adventures from card making to DIY home projects. Scroll down on the right to find posts by labels and dates or try my search bar to find your inspiration.

Happy Crafting!


Showing posts with label Embossing. Show all posts

Thursday, May 31, 2012

Cards Galore!

So there have been a few events in my life in the past couple of months that all warranted a hand-made greeting card.  I thought you might like to see what I’ve been up too…

Birthday Ship
This was a birthday card for my brother-in-law.  I have a hard time with making male cards but I love how this turned out.  I printed out the ship and frame separately from Photoshop so I could have the 3D effect.  The tag I also designed in Photoshop but was inspired from Stamping Up.  You can see more of my “male” cards here.

Butterfly Thank You
This was a super easy Thank You card for a family friend.  I love purple and orange together.  Check out some other Thank You Cards.

Bundle of Joy
I made this card for a baby shower.  I really enjoy hand coloring images, especially ones with kids or Precious Moments characters.  Download some free Precious Moments Boy images here.

Sweethearts
Another Precious Moments card.  This one I had made for a special anniversary.  I love layering papers, it helps give a card more depth.

 Enjoy the Moment
This card is one of my new favorites.  I had a different version of this card that I had made last year for a friends wedding but my new 2-1 border punch from EK Success really makes this version pop!  The image is a royalty free stock photo that I found and the tag is made by me through Photoshop.  You can’t tell in the photo but both are raised up to be 3D.

Gone Fishing
More Precious Moments…I think I have a slight obsession!  I made this card using a template from Wendy Bird Designs.  It was great fun to cut up the different papers and arrange them on the different sections of card. 

OMG Mothers Day
This was my card to my mother for Mother’s Day this year.  The card is stamped with Stampin’ Up’s “Very Vintage Jumbo Wheel Stamp”.  Love that stamp.  It provides such a great, aged look.  I cut the chick out and made her 3D with pop dot stickers;  embossed the “Oh My God” with my Versarmark Marker and Bronze embossing powder.  If you don’t own a Versamark Marker then get one—it has become my favorite embossing tool!  The half flower on the right side of the card is made like my Accordion Flowers post. 

Little Guy Mother's Day
And my last card for this post.  This was the card from my little guy to his Mamaie (that’s Grandma in Romanian).  Isn’t he sooo talented at just 2 & 1/2?!  LOL.  The image of the little fellow I printed out in Photoshop along with the surrounding frame.  The pretty punch is a 2-1 border and chain punch from eksuccess.  Watch for my next post to see how I used that punch for party décor…

So glad you stopped by to see what I’ve been up too…
Hope we can visit again soon and if you have any questions about how I made any of my cards leave me a comment and I’ll be sure to get back to you.

Happy Cardmaking!
The Preacher's Wife
Create

Thursday, April 19, 2012

Journal For Sale

P1180552

I’ve got a new item in my Etsy shop, this pretty journal! 
This journal is the perfect place to write down all that you dream about, hope for, and believe in.
P1180547-001

Read more about it by going to my shop here  or by  clicking my “shop” tab at the top of my page. 
And As Always,
Happy Crafting!

Friday, March 23, 2012

To Do, To Do!

To Do!

     So if you’re at all like me you have a 100 things to do, about 5 min to do them in (okay, so technically it’s more like 15-16 hours but it feels like 5 min), and 1000 distractions to keep you from actually finishing any one task.  Enter the “To Do” list.  Yes I know this is not a new idea, I’m sure the ancient Egyptians had the hieroglyphic “To Do” carved into their walls, which is where we should have kept our lists too.  Not carved of course, something more “semi-permanent”, such as a separate board on our walls;  at least that way we’d have less random pieces of paper around, no accidentally thrown out phone numbers, and we could even keep the receipt for that dress we’ll never fit into pinned up there too!   

     Seems we’ve caught up to the thinking of those ancient Egyptians because now we have the ever so popular message boards everywhere.  Usually comprising of a white board or chalk board and either cork or pins or ribbon to help hold loose items all in your line of sight.  Now you could go buy one, and spend $10 and up, but where’s the fun in that?  Let’s make one.  

    Now you could turn this idea into something much bigger and fancier and make it all your own.  I’m just here to get the ball rolling, and I do hope you’ll roll on and on…

Supplies
Just a note…you can find very inexpensive contact paper at the dollar store.  Sometimes they even have white board paper rolls too!

Measure and Cut
Measure Frame
Border Lines
You can click on the picture above to see it bigger.

Cut out Frame
Decorate Frame
Measure Contact Paper
Peel off Contact Paper
Picture9
Adhesive
Adhered to Cardboard
Attach Wire
Embellish and FunctionHanging Up
I hope you enjoyed!
Happy Crafting!


Wednesday, October 12, 2011

Card for Sale!

P1170483
So it’s official.  I have a shop up and running on Etsy!  Today I put my first card up for sale.  It’s a beautiful Thanksgiving Card, just in time for the holiday in the states.  Check it out in The Preacher's Wife Crafts & Gifts or click on my “Shop” tab at the top of the page.

  P1170472

I’ve included the description from my shop:
This card was inspired by fall. It has layered cardstock in textured olive green and burnt orange colors, and a very detailed hand-colored 3D pumpkin drawing. You'll love the attention to detail on the pumpkins with the added subtle sparkle and the stained, mini clothes pins. "Happy Thanks Giving " is embossed on the front in bronze, with a hand-tied, green, ribbon bow added above with a brad. The inside is simply stamped with two leaves and the rest is left blank for your thoughts to your loved ones. The card has a coordinating envelope that has a stamped and hand-colored pumpkin in the bottom corner.

I do hope you’ll stop by my shop to visit and please know that this is the first item of many to come! (ps.  I’m also interested in special orders so if there’s something you have in mind please let me know and I’d be happy to help Winking smile)

Sunday, October 2, 2011

Autumn Napkin Rings

Picture12


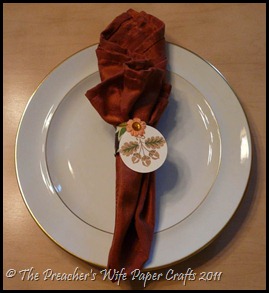
It’s almost Thanksgiving here in Canada and, like I promised in my last post, I have some napkin rings to add some fall flair to your dinner table.  You can also see these napkin rings in a table setting at Leia's Culinary Treasures, my mothers fabulous blog.  While these particular ones are for autumn, you can vary this project for all sorts of occasions.  I hope you enjoy making these for your holiday feast.

Picture1
Picture2
Picture3
Picture4
Picture5
Picture6


Picture7(If you don’t know basic steps for embossing check out my post "Lampshade" to see the simple steps.)

Picture8
Picture9Picture10
             Picture11
These napkin rings are so easy to make.  I hope you try them out and some fun to your table.
Happy Scrapping!